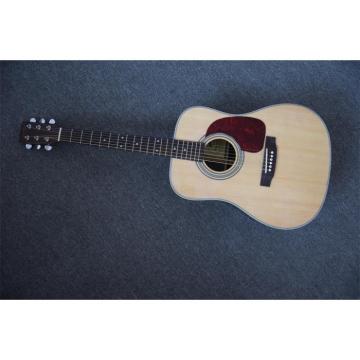
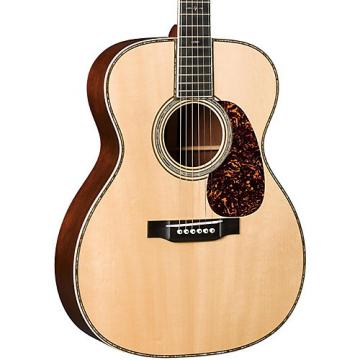
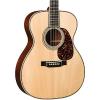
Remaining true to its origins, the Authentic Series 1939 000-42 Auditorium Acoustic Guitar is meticulously crafted with hide glue construction, dovetail neck joint, solid Adirondack spruce top with Vintage Tone System, solid Madagascar rosewood back and sides and black ebony fingerboard and bridge. This is a 000 model that will reward players with its rich sustain and crisp tone for generations.
Vintage Tone SystemThe Martin Vintage Tone System (VTS) uses a unique recipe that is based on the historic torrefaction system. VTS acts much like a time machine in which Martin can target certain time periods and age the top/braces to that era. This focused method allows Martin’s craftsmen and craftswomen to recreate not only the pleasing visual aesthetics of a vintage guitar, but also reproduce the special tones previously reserved for vintage instruments.
Further, Martin Guitar’s Research and Development (R&D) team rediscovered a process used by our craftsmen and craftswomen in the early 1900s to final dress the lacquer on our instruments by hand. The end result is a warm glow appearance that is as enticing to the eye as it is to the touch. The Vintage Gloss finish leaves the guitar with a satin appearance, far from the appearance of a satin spray.
Body
Body type:000-14 Fret
Cutaway:Non-cutaway
Top wood:AdirondackSpruce
Back & sides:MadagascarRosewood
Bracing pattern: Authentic Spruce with VTS
Body finish:Gloss
Orientation:Right handed
Neck
Neck shape: Authentic 1939
Nut width:1.69" (43mm)
Fingerboard:Ebony
Neck wood:Solid Genuine Mahogany
Scale length:24.9"
Number of frets:20
Neck finish:Gloss
Electronics
Pickup/preamp:No
Brand:Not applicable
Configuration:Not applicable
Preamp EQ:Not applicable
Feedback filter:Not applicable
Tuner:Not applicable
Other
Headstock overlay:MadagascarRosewood
Tuning machines:NickelEnclosed Gear
Bridge:Ebony
Saddle & nut:Bone
Number of strings:6-string
Special features: Body shape
Case:Hardshell case
Accessories:None
This special Martin is worth every penny. Order today!
Custom Guitar's Friend Gold Coverage
Gold Coverage goes above and beyond the manufacturer's warranty to protect your gear from unexpected breakdowns, accidental damage from handling
and failures. This plan covers your product for one, two, three or up to five years from your date of purchase, costs just pennies per day and gives you a
complete "no-worry" solution for protecting your investment.
Gold Coverage Includes:
Unexpected and unintentional spills, drops and cracks
Normal wear and tear
Power surges
Dust, internal heat and humidity
Other plan features include:
For products over $200, No Lemon Policy applies. If it fails for the same defect 3 times, it is replaced on the 4th breakdown. (Does not apply to failures due to drops, spills, and cracks)
For products under $200 experiencing the above failures, a Custom Guitar's Friend gift card will be issued for the full price of the product + tax.
Shipping fees covered if required for repair or replacement
Plans are transferable in the event merchandise is sold
Plans are renewable on new gear
*Limitations and exclusions apply. See terms and conditions for program details
Term for New Gear begins on date of purchase but does not replace the store return policy or manufacturer coverage.